How To Replace A Failing Drive On a ZFS Pool in a TerraMaster D4-300
Having a faulty drive can be stressful. You hope that you’ve backed up all the data you need from it on a regular basis. Also while you source another drive of the same or higher capacity, you hope that any other drives you have don’t also fail.
A real issue is knowing when a drive is about to fail. Have you been regularly running smartctrl checks? Even if you did chances are that you won’t detect any errors until the drive is about to completely fail. That gives you very little time to rectify the issue.
ZFS can help with some of the above. It can detect when a drive is about to fail and notify you as soon as a failure is detected. Your ZFS pool has you covered (if you have enough disks for redundancy) while you source a replacement drive. Replacing the drive once you get it is “easy” once you know what to do. Hence the reason for this article to document those steps.
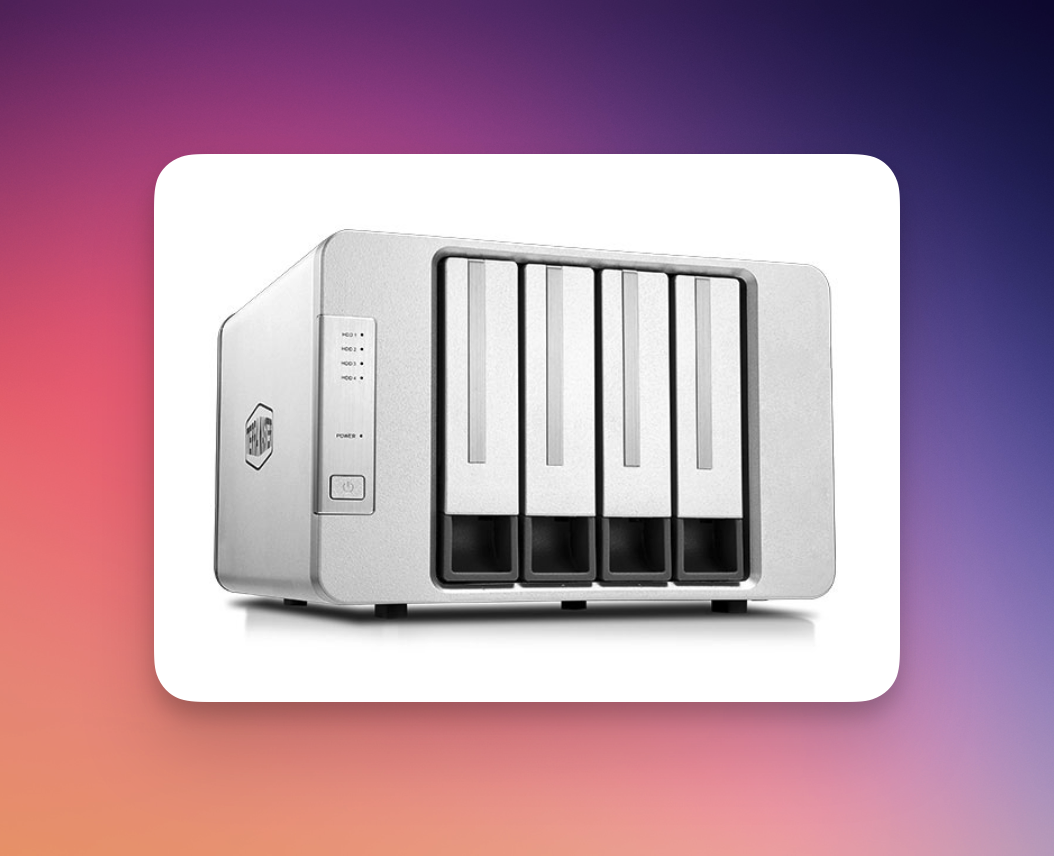
To complicate things a little more, I’m running ZFS on an array of disks inside of a TerraMaster D4-300 via USB-C. The host machine is a Zimaboard 832.
One thing ZFS doesn’t do for you is to backup your data. It’s recommended that you run regular backups on your data. Having destroyed a ZFS pool in the past, I can attest that the ZFS is not a backup, is a valid statement.
Workflow
If a hardware fault occurs and if you regularly schedule ZFS scrubs, it will detect it and marks the drives as FAULTED, OFFLINE or DEGRADED. It’s important to note that if you don’t run regular ZFS scrubs, that it can take a while for the error to be detected. I run scrubs three times a day; around every 8 hours.
Verify the status of the drive
Run a zpool status <YOUR POOL NAME> and verify the status of the faulty drive. You should see something like this:
  pool: YOUR POOL NAME
 state: DEGRADED
status: One or more devices are faulted in response to persistent errors.
        Sufficient replicas exist for the pool to continue functioning in a
        degraded state.
action: Replace the faulted device, or use 'zpool clear' to mark the device
        repaired.
  scan: scrub in progress since Sun Nov 26 05:30:02 2023
        1013G scanned at 1.20G/s, 297G issued at 359M/s, 1.41T total
        0B repaired, 20.51% done, 00:54:38 to go
config:

        NAME                                     STATE     READ WRITE CKSUM
        YOUR POOL NAME                           DEGRADED     0     0     0
          raidz1-0                               DEGRADED     0     0     0
            scsi-STDAS_TerraMaster_9DB202102202  ONLINE       0     0     0
            scsi-STDAS_TerraMaster_ADB202102202  FAULTED     97     0     0  too many errors
            scsi-STDAS_TerraMaster_BDB202102202  ONLINE       0     0     0
            scsi-STDAS_TerraMaster_CDB202102202  ONLINE       0     0     0
Notice that state is DEGRADED and STDAS_TerraMaster_ADB202102202 is FAULTED with too many errors.
The action section tells us what to do:
Replace the faulted device, or use ‘zpool clear’ to mark the device repaired.
Note down the degrade drive id STDAS_TerraMaster_ADB202102202 for use when replacing the drive.
Finding information about the failed drive

The following details will help you identify the physical drive to replace in the enclosure.
Find the drive id and mappings
Find the drive id and drive mappings for the failed drive with lsblk:
lsblk -o NAME,SIZE,SERIAL,LABEL,FSTYPE,PATH,MODELwhich will have an output similar to:
NAME              SIZE SERIAL       LABEL  FSTYPE      PATH                              MODEL
loop0            63.3M                     squashfs    /dev/loop0
loop1            63.3M                     squashfs    /dev/loop1
loop2           111.9M                     squashfs    /dev/loop2
loop3            49.8M                     squashfs    /dev/loop3
loop4            53.2M                     squashfs    /dev/loop4
sda             931.5G 2250E693A93F                    /dev/sda                          CT1000BX500SSD1
├─sda1              1G                     vfat        /dev/sda1
├─sda2              2G                     ext4        /dev/sda2
└─sda3          928.5G                     LVM2_member /dev/sda3
  └─ubuntu--vg-ubuntu--lv
                928.5G                     ext4        /dev/mapper/ubuntu--vg-ubuntu--lv
sdb               2.7T 9DB202102202                    /dev/sdb                          TerraMaster
├─sdb1            2.7T              fspool zfs_member  /dev/sdb1
└─sdb9              8M                                 /dev/sdb9
sdc               3.6T ADB202102202                    /dev/sdc                          TerraMaster
├─sdc1            3.6T              fspool zfs_member  /dev/sdc1
└─sdc9              8M                                 /dev/sdc9
sdd               2.7T CDB202102202                    /dev/sdd                          TerraMaster
├─sdd1            2.7T              fspool zfs_member  /dev/sdd1
└─sdd9              8M                                 /dev/sdd9
sde               3.6T BDB202102202                    /dev/sde                          TerraMaster
mmcblk0          29.1G 0x4efa2725                      /dev/mmcblk0
├─mmcblk0p1       512M                     vfat        /dev/mmcblk0p1
├─mmcblk0p2      27.7G                     ext4        /dev/mmcblk0p2
└─mmcblk0p3       977M                     swap        /dev/mmcblk0p3
mmcblk0boot0        4M 0x4efa2725                      /dev/mmcblk0boot0
mmcblk0boot1        4M 0x4efa2725                      /dev/mmcblk0boot1
Finding the drive make,model and serial number
To find out the drive information use smartctl:
smartctl -i "$DRIVE_PATH" | grep 'Model\|Capacity\|Serial'where DRIVE_PATH is the path to the new drive. Eg: /dev/sdc.
You should get some output of the form:
Model Family:     Western Digital Red
Device Model:     WDC WD30EFRX-68AX9N0
Serial Number:    WD-WCC1T0934440
User Capacity:    3,000,592,982,016 bytes [3.00 TB]
Finding the disk id
You need to find the disk id of the drive that failed. You can do that by running by-id:
DRIVE_NAME="YOUR_DRIVE_NAME"
DRIVE_ID=$(ls -l /dev/disk/by-id/ | grep "$DRIVE_NAME" | grep -v '\-part' | grep 'scsi-' | cu    t -d' ' -f10)
echo "Drive Id:"
while IFS= read -r d; do
  echo "$d"
done <<< "$DRIVE_ID"
Ensure to replace YOUR_DRIVE_NAME with your drive name. Eg. sdc.
You should get an output of the form:
Drive Id:
scsi-35000000000000001
scsi-STDAS_TerraMaster_ADB202102202
One of these drive ids should match that failed drive id you noted down Verify the status of the drive.
Replacing the physical drive

- The first thing to do is
offlinethe drive. That ensures that ZFS takes it out of the pool. You can offline the drive with:
sudo zpool offline <YOUR POOL NAME> <DRIVE_ID>For example, in the above scenario STDAS_TerraMaster_ADB202102202 was the faulty drive:
sudo zpool offline YOUR_POOL_NAME STDAS_TerraMaster_ADB202102202- Shutdown your machine that has the ZFS pool
In the past I’ve seen ZFS get confused when you change drives while everything is online. This is an optional step but I do it for my piece of mind.
Note: After a reboot your drive mappings can change. Eg. /dev/sdd can become /dev/sde, but your drive id will be the same: STDAS_TerraMaster_ADB202102202.
- Turn off the
TerraMaster D4-300. - Remove the faulty drive from enclosure.
How do you know which drive to remove?
I have a rudimentary labelling scheme where I map each drive make, model, serial number and size to the slot on the TerraMaster D4-300. I have this as postit notes on top of the enclosure.
For example:
Slot 1: Model Western Digital Red, WDC WD30EFRX-68AX9N0, WD-WCC1T0934440, 4TB
Slot 2: ..
Slot 3: ..
Slot 4: ..
- Insert the replacement drive into caddy and put it into the enclosure.
- Turn on the
TerraMaster D4-300.
Another note is that I can’t seem to cold boot
TerraMaster D4-300with all the drives inserted. I am not sure if this is an issue with theTerraMaster D4-300itself or whether I’ve got some other issue with power etc. What I end up doing here is taking all the drives out and inserting them in one at a time until I hear each one boot up. Then I insert the next drive and so on.
- Turn your machine back on.
- Once your machine boots (and if you got this far, things are looking good), we need to find out some information about the replacement drive such as drive mappings, drive id etc.
Get information about the replacement drive
Find out details about the replacement drive to ensure you’re replacing with the correct drive.
Find the drive id and mappings
Find the drive id for the new drive with lsblk:
lsblk -o NAME,SIZE,SERIAL,LABEL,FSTYPE,PATH,MODELwhich will have an output similar to:
NAME              SIZE SERIAL       LABEL  FSTYPE      PATH                              MODEL
loop0            63.3M                     squashfs    /dev/loop0
loop1            63.3M                     squashfs    /dev/loop1
loop2           111.9M                     squashfs    /dev/loop2
loop3            49.8M                     squashfs    /dev/loop3
loop4            53.2M                     squashfs    /dev/loop4
sda             931.5G 2250E693A93F                    /dev/sda                          CT1000BX500SSD1
├─sda1              1G                     vfat        /dev/sda1
├─sda2              2G                     ext4        /dev/sda2
└─sda3          928.5G                     LVM2_member /dev/sda3
  └─ubuntu--vg-ubuntu--lv
                928.5G                     ext4        /dev/mapper/ubuntu--vg-ubuntu--lv
sdb               2.7T 9DB202102202                    /dev/sdb                          TerraMaster
├─sdb1            2.7T              fspool zfs_member  /dev/sdb1
└─sdb9              8M                                 /dev/sdb9
sdc               3.6T ADB202102202                    /dev/sdc                          TerraMaster
├─sdc1            3.6T              fspool zfs_member  /dev/sdc1
└─sdc9              8M                                 /dev/sdc9
sdd               2.7T CDB202102202                    /dev/sdd                          TerraMaster
├─sdd1            2.7T              fspool zfs_member  /dev/sdd1
└─sdd9              8M                                 /dev/sdd9
sde               3.6T BDB202102202                    /dev/sde                          TerraMaster
mmcblk0          29.1G 0x4efa2725                      /dev/mmcblk0
├─mmcblk0p1       512M                     vfat        /dev/mmcblk0p1
├─mmcblk0p2      27.7G                     ext4        /dev/mmcblk0p2
└─mmcblk0p3       977M                     swap        /dev/mmcblk0p3
mmcblk0boot0        4M 0x4efa2725                      /dev/mmcblk0boot0
mmcblk0boot1        4M 0x4efa2725                      /dev/mmcblk0boot1
Finding the drive make, model and serial number
To ensure you’re replacing the correct drive find out the drive information with smartctl:
smartctl -i "$DRIVE_PATH" | grep 'Model\|Capacity\|Serial'where DRIVE_PATH is the path to the new drive. Eg: /dev/sdc.
You should get some output of the form:
Model Family:     Western Digital Red
Device Model:     WDC WD30EFRX-68AX9N0
Serial Number:    WD-WCC1T0934440
User Capacity:    3,000,592,982,016 bytes [3.00 TB]
Finding the disk id
You need to find the disk id of the drive you want to replace. You can do that by running by-id:
DRIVE_NAME="YOUR_DRIVE_NAME"
DRIVE_ID=$(ls -l /dev/disk/by-id/ | grep "$DRIVE_NAME" | grep -v '\-part' | grep 'scsi-' | cu    t -d' ' -f10)
echo "Drive Id:"
while IFS= read -r d; do
  echo "$d"
done <<< "$DRIVE_ID"
Ensure to replace YOUR_DRIVE_NAME with your drive name. Eg. sdc.
You should get an output of the form:
Drive Id:
scsi-35000000000000001
scsi-STDAS_TerraMaster_ADB202102202
You can use any of the ids returned returned to do the ZFS drive replacement. I usually use the scsi-STDAS_TerraMaster_ version.
Replacing the drive in the ZFS Pool

Now that we have all the information we need, we can finally replace the drive in the ZFS pool with zpool replace:
sudo zpool replace <YOUR POOL NAME> <OLD_ID> <NEW DRIVE ID>For example:
sudo zpool replace <YOUR POOL NAME> scsi-STDAS_TerraMaster_ADB202102202 /dev/disk/by-id/scsi-STDAS_TerraMaster_ADB202102202If all goes well, when you do a zpool status <YOUR POOL NAME> you should see :
  pool: <YOUR POOL NAME>
 state: DEGRADED
status: One or more devices is currently being resilvered.  The pool will
        continue to function, possibly in a degraded state.
action: Wait for the resilver to complete.
  scan: resilver in progress since Sun Nov 26 06:05:37 2023
        374G scanned at 46.8G/s, 16.0M issued at 2.00M/s, 1.41T total
        0B resilvered, 0.00% done, no estimated completion time
config:

        NAME                                       STATE     READ WRITE CKSUM
        YOUR POOL NAME                             DEGRADED     0     0     0
          raidz1-0                                 DEGRADED     0     0     0
            scsi-STDAS_TerraMaster_9DB202102202    ONLINE       0     0     0
            replacing-1                            DEGRADED     0     0     0
              old                                  OFFLINE      0     0     0
              scsi-STDAS_TerraMaster_ADB202102202  ONLINE       0     0     0
            scsi-STDAS_TerraMaster_BDB202102202    ONLINE       0     0     0
            scsi-STDAS_TerraMaster_CDB202102202    ONLINE       0     0     0

errors: No known data errors
Note that the action states that:
One or more devices is currently being resilvered
and the scan states that:
resilver in progress
and it states that a replacement is active:
            replacing-1                            DEGRADED     0     0     0
              old                                  OFFLINE      0     0     0
              scsi-STDAS_TerraMaster_ADB202102202  ONLINE       0     0     0
Now in a few hours, depending on how much data you have, you should be back good!